
Stormwater is indeed a natural menace to your roofs that not only damages the roof shingles but might cause leaks. Well, not anymore! Today, we’ll tell you about different roof flashings, their designs, and their installation to save your roofs from further water damage and runoff.
Key Takeaways
- There are 14 types of roof flashings based on the design and materials used. We have explained each one in detail below!
- Valley or step flashings work the best in high-rainfall areas. But, we have also added some tips to increase the efficiency of other types of flashing.
- Apron and Saddle flashings are the best to eradicate mold, mildew, and pests. You can check out more pros and cons from the list.
- Drip Edge, Vent Pipe, Step, Chimney, and Skylight flashings work for both flat and pitched roofs.
So, let’s analyze all the pros and cons of different roof flashing systems, their costs, tips, and FAQs to install the flashing on a budget.
What Is Roof Flashing & What Does It Do?
Roof flashing is a flat metal strip that creates a tight water seal around the roof’s edges, valleys, and apex points and redirects all the stormwater to the gutter. It prevents water pooling and stagnation on the top and protects the weaker roof joints from leaks.
Roof flashing comes with various benefits as listed below:
- Prevents water from getting into the wall gaps and chimneys
- Protects the shingles and enhances the durability
- Reduces water pooling and seepage
- Eliminates mold, mildew, and fungi
- Might increase the resale value of your house
Where Should You Add Roof Flashing?
Roof flashing is usually mounted on the highest point of the roof, at the apex. But, you can also install it in the following places for complete moisture control.
- Side walls, Exterior walls, and Gable walls
- Roof valleys and Slopes
- Roof overhangs, Bathroom vents, and Skylights
- Roof edges and Rakes
Types of Flashing Based on Design and Function
Roof flashings aren’t universal; each flashing has a different design that suits different roof parts. Some flashings reduce water stagnation and pooling at the apex, whereas others eliminate the extra leaks at the eaves and soffits.
So, let’s analyze different flashing designs and pick the right one that suits your climate and runoff.
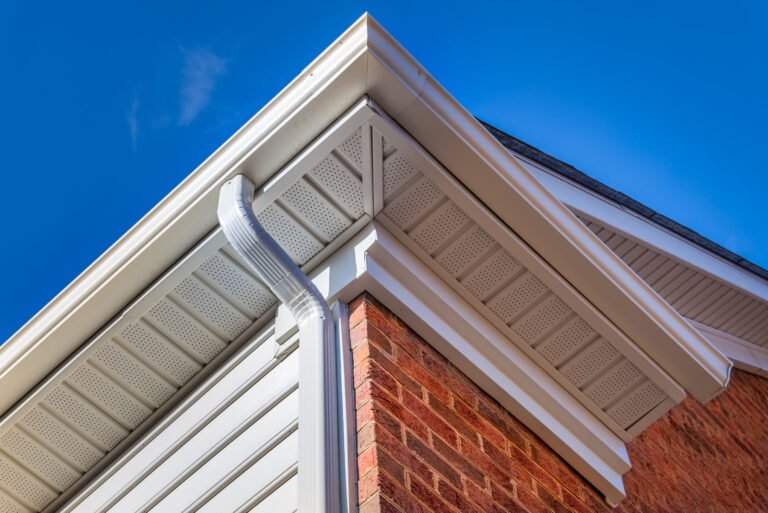
1. Drip Edge
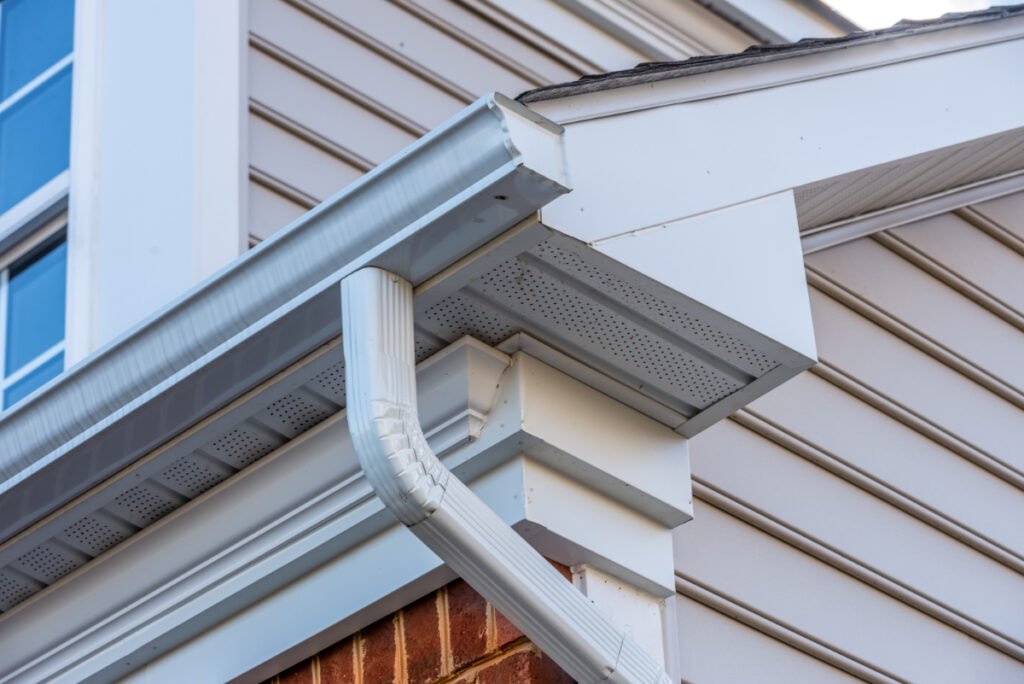
What Is It: A drip edge is a small metal weatherstripping at the outer edges of the roof that drains all the excess water from the fascia and prevents leaks near the roof overhangs.
Drip edges are like overflow drains that redirect the excess gutter water to the edge and discharge it to the drain below. Thus, they not only prevent water seepage under the gutters and fascia but also protect the external walls from mold and mildew.
Similarly, drip edges also prevent rainwater from penetrating under the shingles. So, it’s advisable to install them along the whole roof line as a perimeter drain.
Furthermore, this flashing is really easy to build or install but might not fit olden and curvilinear roofs. And you might need 2-3 drip edges for multi-layered or skillion roofs.
Drip edges are further governed by specific HOA rules and might face a fine if installed incorrectly. Some rules are:
- Drip edges must be installed only on the roof’s edges.
- They shouldn’t be in-line with the roof and must have an overhang of 1-2 inches from the roof line.
| Average Cost | $1 – 2 per linear foot |
| Average Lifespan | 10 – 15 years |
| Standard Materials | Galvanized Metal, Vinyl-coated Aluminum |
Pros:
- Reroute the excess water and reduce damage
- Prevent rotting of the fascia boards
- Support shingles and roof trusses
- Protect the roof from molds, mildew, and fungi
- Affordable and easy to install
Cons:
- Need a roof gutter to function properly
- Might not fit abstract roofs
- Incur separate installation and maintenance charges
Use smaller 12-inch screw gaps to nail the drip edge to the roof and add a rubber sealant for better stability.
2. Valley Flashing
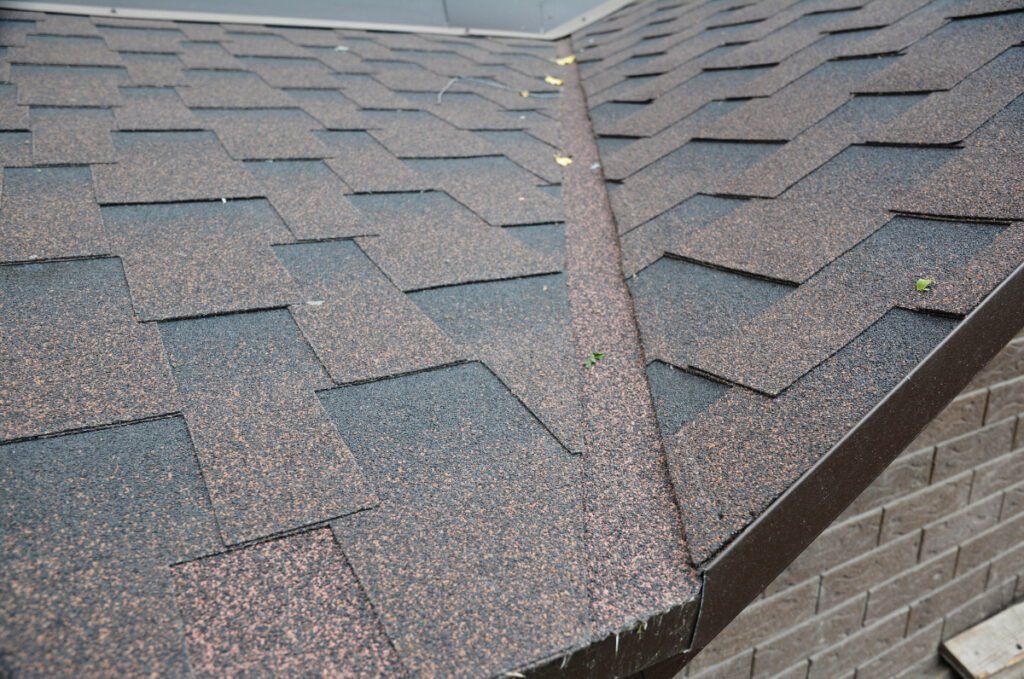
What Is It: Valley flashing is a 24-inch wide channel that diverts water from the angular dip where two roof slopes meet.
Valley flashing is a W-shaped metal flashing that eliminates water pooling in the low-raised areas of the roof and saves it from leakage. It prevents water from going under the shingles and extensively prevents rotting, weathering and discoloration.
Usually, it works as a mid-span gutter and carries all the water to the drip edge. So, needless to say, it has a fast drainage speed and prevents mold and fungi effectively. However, you’ll need to seal it with cement to protect it from pests and webs.
Valley flashings are further divided into three types for different water flow and roof designs. They are:
- Open Valleys: Open valleys are thin, welded metal sheets placed between the shingles to tackle lower rainfall, winds, and snow.
- Closed Valleys: Closed Valleys have small copper pipes that direct heavy rain and snow to a catchbasin at the end of the valley for faster drainage.
- Baffle Valleys: Baffle valleys balance the gaps between uneven slopes, carry heavy rain to the drip edge and prevent surface percolation.
| Average Cost | $4 – 10 per linear foot |
| Average Lifespan | 20 – 25 years |
| Standard Materials | Aluminum, Copper, Stainless Steel |
Pros:
- Works as a waterproof liner over the shingles
- Adjusts to different runoff speeds and rainfall
- Concealed and aesthetically pleasing
- Easy to Install, Maintain and Repair
Cons:
- High installation and labor cost
- Do not work with uneven slopes or multi-layered slopes
- Might cause more friction and weathering
Never nail the valley flashings in the middle, as it might add more pressure to its walls and cause backflow.
3. Vent Pipe Flashing
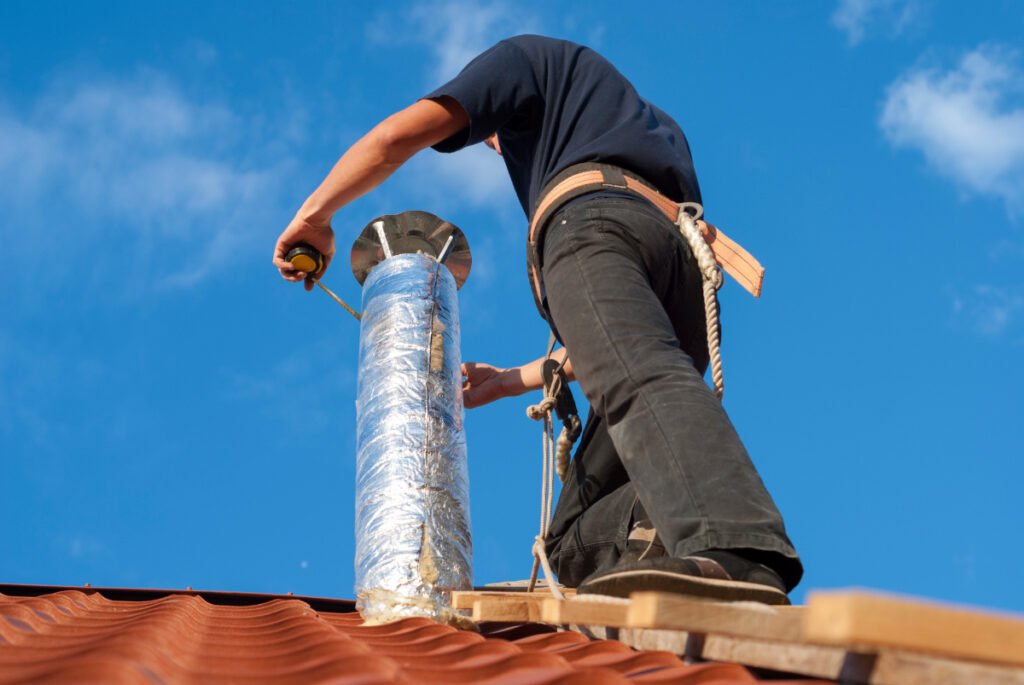
What Is It: Vent pipe flashing is a curvilinear pipe that passes through the rooftop, prevents expansion or contraction due to temperature changes, and thus protects the shingles from falling off.
Cylindrical pipe flashing works in the same way as a typical roof vent and carries all the hot air and exhaust away from the roof. So, you can use it for better temperature control and ventilation with dry climates and pitched roofs.
These pipes might cause leakage issues with heavy rain or snow. So, don’t forget to install a vent cap and add caulk or sealant for better moisture control. Or, you can add a rubber sleeve to protect the pipe from moisture and rust.
| Average Cost | $75 – 100 per pipe |
| Average Lifespan | 20 – 30 years |
| Standard Materials | Aluminum, Lead, Rubber, PVC |
Pros:
- Supplies fresh air and keeps the roof dry
- Maintains the temperature in hot areas
- Flexible and Easy to install
- Prevents moisture seepage to the surrounding walls
Cons:
- Might fail in high rainfall regions
- Poor pest, and mold resistance
- Protrudes from the rooftop and is easily visible
Install a PVC pipe clamp around the pipes to protect them from corrosion and weathering due to the sun and rain.
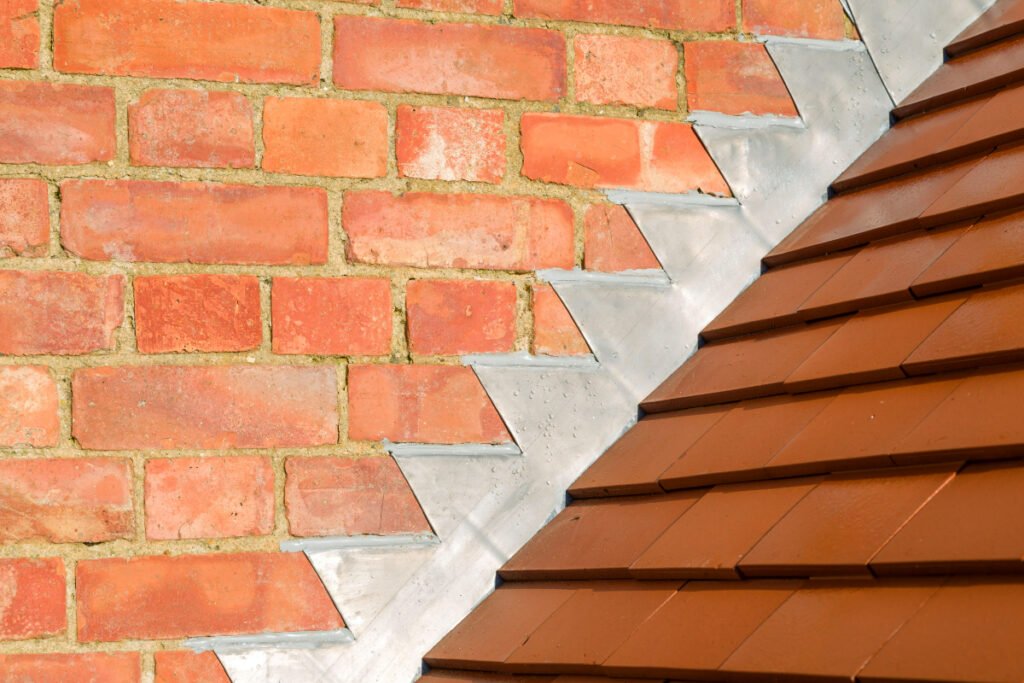
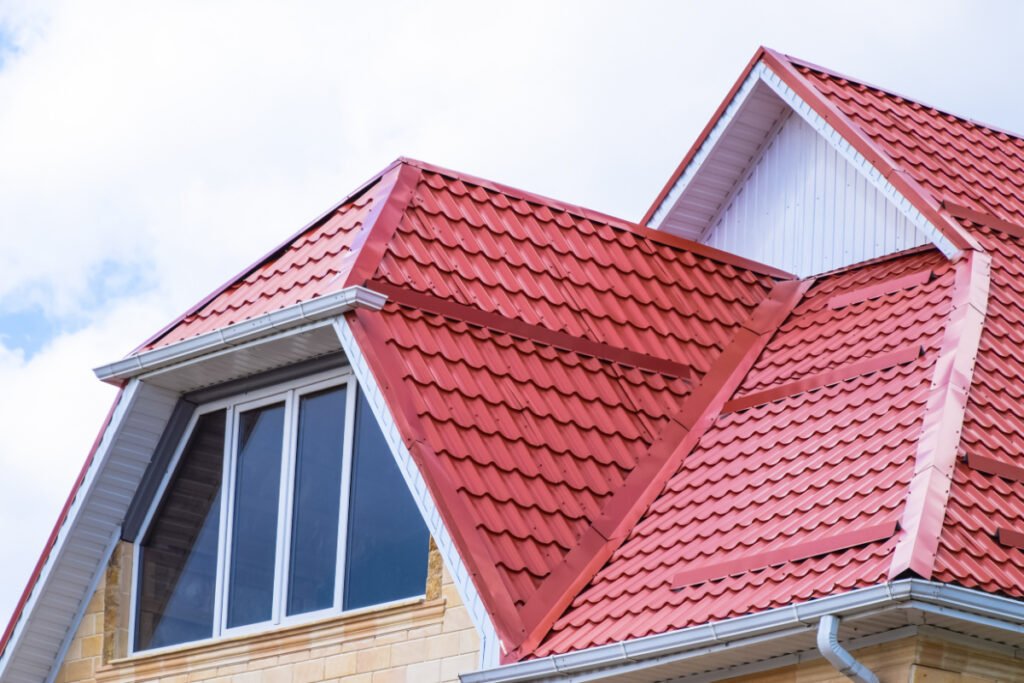
4. Step Flashing
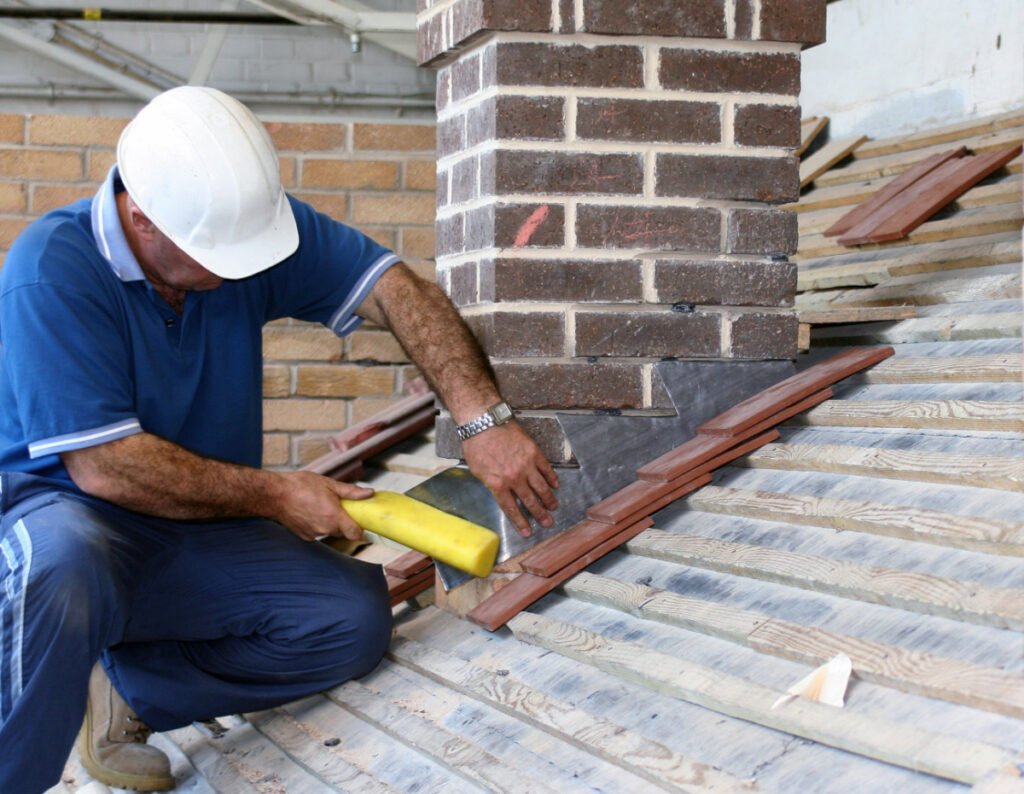
What Is It: Step flashing is a bent, vertically-aligned flashing between the sidewalls, dormer windows, and chimneys that stops water from penetrating these exhaust devices and harming the roof structure.
Step flashing is a vertically ascending structure along the finer gaps of various roof elements. Thus, it acts like a curtain that stops the water flow and prevents dripping along the walls and windows.
And it even gets rid of the mold and prevents corrosion along painted roof lines and fascia strips. So, you can easily use it in humid and high rainfall areas.
Additionally, step flashing has a natural raise. So, it has a fast drainage speed and works on gravity, thus lowering your energy costs considerably. It also makes it difficult for pests and birds to enter the attic and provides complete control over the roof line.
| Average Cost | $200 – 500 |
| Average Lifespan | 30 – 35 years |
| Standard Materials | Plastic, Metal, Rubber, Roofing Felt |
Pros:
- Balances the roof and adds strength
- Cuts down energy costs and bills
- Protects from Mildew and Pests
- High drainage speed
Cons:
- Difficult to Install and Repair
- Might slow the exhaust and make attics warmer
- Might skid with heavy rain
Use galvanized nails and quick drying cement under each step for better stability and anti-skidding strength during heavy rainfall.
5. Chimney Flashing
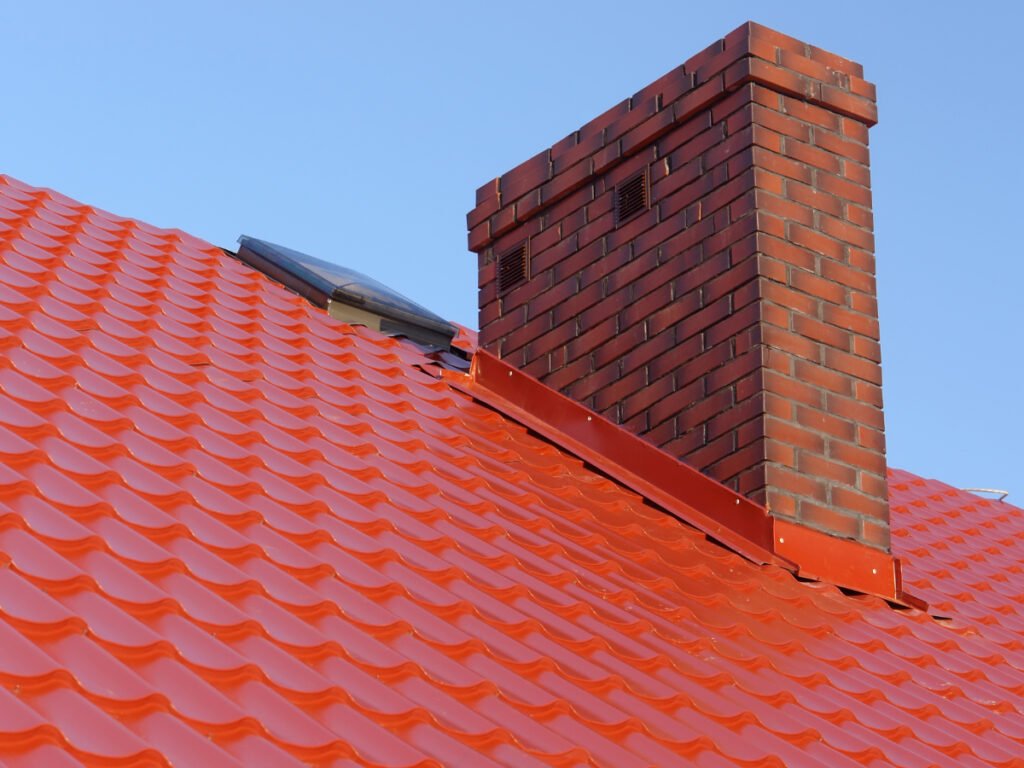
What Is It: Chimney flashing consists of a base and a pointed cap that prevents leaks along the junctions of the roof and the chimneys and offers a high exhaust speed simultaneously.
Chimney flashing is an L-shaped metal under the shingles and the chimney walls that create a water-tight seal and prevents water seepage inside the rafters. It helps with accidental water leaks below the shingles and doesn’t drain roof runoff like traditional flashing systems.
Moreover, this flashing has a descending slope that channels the water towards the roof edge. So, it is more concealed and isn’t starkly visible on the roofline. It even has a continuous mortar joint and is more stable and secure.
However, this flashing has no mold or pest resistance and might rust with excess runoff. So, it’s advisable to coat it with enamel or add suitable anti-rust agents for better performance.
| Average Cost | $1000 – 1200 |
| Average Lifespan | 20 – 30 years |
| Standard Materials | Galvanized Iron, Aluminum, and PVC |
Pros:
- Stable and High-strength
- Properly concealed
- Creates a strong water-tight seal without caulk and sealants
- Easy to Install and Repair
Cons:
- Low pest and corrosion resistance
- High cost
- Low drainage speed
- Doesn’t work with heavy roof runoff
Periodically clean and scrub the flashing with a wire brush, and install a fiberglass mesh to protect it from pests.
6. Headwall or Apron Flashing
What Is It: Apron flashing is a slightly stepped flashing to prevent potential leaks at the junction of a sloped roof and a vertical wall, vent, or chimney.
Apron flashing is an L-shaped flashing behind the main roof siding that functions as a shallow gutter and carries the roof’s runoff towards the main drain pipe, away from the walls. It also has rounded corners and a high slope for faster drainage speed.
This flashing is typically constructed in Aluminum and Steel and hence it is lightweight and flexible but can rust due to extreme climate conditions. So, limit it to tropical climates or add a cap or enamel coat to prevent water damage.
Nevertheless, apron flashing is really affordable and moisture-resistant and prevents pests and birds from entering the attic. Similarly, it protects the fascia board from excessive water leaks and prevents wood rot along the rafters.
| Average Cost | $12 – 14 per linear foot |
| Average Lifespan | 30 – 40 years |
| Standard Materials | Alloyed Steel, Stainless Steel, Aluminum |
Pros:
- Seals roof deck and gaps
- Secures the fascia and the rafters
- High climate, pest, and mold resistance
- Affordable and Easy to Install
Cons:
- Not included in standard roof installation and incurs separate charges
- Difficult to mount after the roof deck has been built
- Might break due to pressure
Avoid stepping or kneeling on the apron flashing as the added weight might break the channel and damage the roof joints. Instead, add a ladder next to it during repairs.
7. Saddle Flashing
What Is It: Saddle flashing is a metal cap flashing that creates a tight water seal at the junction of the roof railings, parapet, and exterior wall and prevents water leaks into the beams and joists.
Saddle flashing is a one-piece flashing at the joist and cantilever level. So, it doesn’t have many moving parts and, thus, is easy to install, repair, and maintain. Plus, it has greater tensile strength than other flashings and doesn’t break or buckle easily.
And since it creates a water-tight seal along the roof, it might as well protect the roof from fungus. So, you can freely use it in humid tropical climates without much maintenance.
But, saddle flashing has a lower drainage speed and won’t discharge all the roof runoff efficiently. Hence, you’ll need to combine it with a step or valley flashing for all-around protection.
And it is further governed by a set of installation rules according to different homeowners associations. Some of them are:
- There should be no penetrations at the top surface of the flashing and the balustrade.
- There must be an overlap of 70-90 mm to provide more strength and stability in windy areas.
- All the flashings must be installed on a rigid brick wall underlay or a non-porous cement sheet.
| Average Cost | $200 – 300 |
| Average Lifespan | 20 – 25 years |
| Standard Materials | Aluminum, Plastic, Sheet metal |
Pros:
- Lesser parts and no laps or joints
- Suitable in all climates – rainy, sunny, and windy
- Doesn’t split on heavy nailing
- Can be easily cut to fit different railings and parapets
Cons:
- Might discolor and rust easily
- Slow drainage speed
- Little expensive and additional maintenance costs
Use mild non-abrasive cleaners, dish soap, and soft scouring pads to prevent discoloration or flaking during cleaning and maintenance.
8. Skylight Flashing
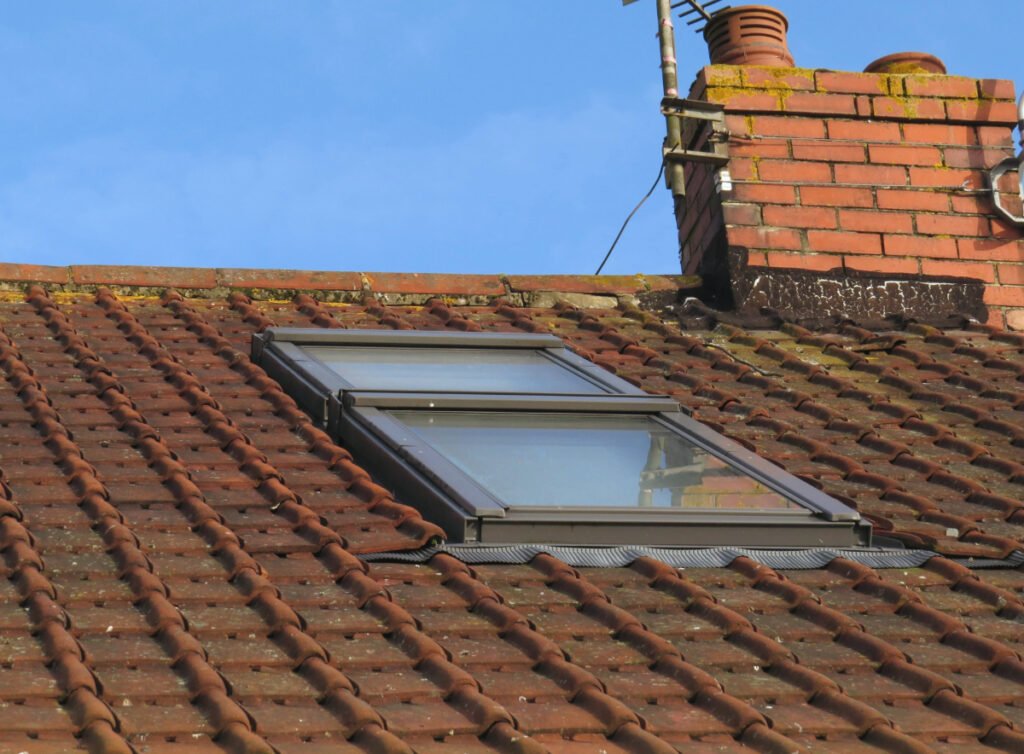
What Is It: Skylight flashing is a thin, metal sheet flashing around the roof’s skylights and vents to eliminate the water leaks and prevent water from seeping inside its framing.
Since skylight flashing is a type of membrane or collar flashing, it is highly flexible and seals all the gaps around the window frames and shingles. And it has a funnel-like trapezoidal shape that aligns the flashing angle with the roof and prevents leaks at the framing.
Additionally, skylight flashing has a lesser thickness, so it has slow drainage and might not catch the excess runoff from the roof. So, installing it in sunny or low-rainfall areas is advisable.
And don’t forget to add caulk or sealants along its surface to eliminate the mold and keep pests away.
| Average Cost | $300 – 400 |
| Average Lifespan | 20 – 25 years |
| Standard Materials | Metal, Fiberglass or Glazing |
Pros:
- Flexible and creates a tight seal
- Concealed
- Bends along the corners of the framing easily
Cons:
- Slow drainage
- Isn’t quite efficient in high-rainfall areas
- Low mold and pest control
Add a vapor barrier to neutralize all the exhaust around the flashing and keep it cool at all times.
Comparing Popular Flashing Designs
| Parameter | Drip Edge Flashing | Valley Flashing | Pipe Flashing | Step Flashing | Chimney Flashing | Apron Flashing | Saddle Flashing | Skylight Flashing |
| Location | Roof edge | Roof center | Roof top | Roof sides | Along Chimneys | Vertical wall junctions | Under-roof railings | Around the skylights |
| Average Depth | 1.5” | 3 – 4” | 8 – 9” | 2 – 3” | 1 – 2” | 3 – 4” | 1.5 – 2” | 1 – 1.5” |
| Cost | Low | Moderate | Moderate | High | High | Low | Moderate | High |
| Ease of Installation | Easy | Easy | Moderate | Difficult | Easy | Easy | Moderate | Easy |
| Drainage Speed | Moderate | Fast | Slow | Fast | Slow | Fast | Slow | Slow |
| Mold Control | Yes | Yes | No | Yes | No | Yes | Yes | No |
| Pest Control | Yes | No | No | Yes | No | Yes | Yes | No |
| Roof Type | Flat / Pitched | Pitched / Gable | Flat / Pitched | Flat / Pitched | Flat / Pitched | Shed / Pitched | Flat / Terraced | Flat / Pitched / Gable |
Types of Flashings Based on Materials
Flashing materials impact the overall weather resistance, durability and cost of any roof flashing. So, it’s necessary to pick the right flashing material to create a watertight seal and reduce the leaks around the roof line.
But what are the right materials? Let us find out below.
9. Aluminum
Aluminum is an extremely popular, lightweight, and durable flashing material. And it can be easily painted or powder coated to match your roof’s style and design.
However, it rusts quickly and might discolor with heavy rain and sun exposure. So, you’ll need to coat it with enamel or anti-rust solutions for better weather resistance.
10. Copper
Copper flashings are expensive but highly flexible and bend along all the smaller gaps and niches on the roof line. So, they are used along chimneys, step flashings, and smaller skylight flashings for better water resistance.
11. Lead
Lead flashings are extremely flexible and water-tight and can be used in roof valleys or wall junctions for better moisture protection.
However, they are pretty heavy and bulky. So, using them on flat or low-sloped roofs is advisable for better stability.
12. Sheet Metal
Metal – Stainless steel or Alloyed flashings are extremely durable and have a faster drainage speed that handles heavy roof runoff easily.
However, these can rust due to continuous rain and need a sealant to prevent oxidation. Or, you can even paint or powder coat them for better durability.
13. PVC
PVC flashings are flexible and lightweight but cannot handle heavy rain and runoff. But, they are the best for creating a water-tight seal in step or chimney flashings, concealed under the shingles.
14. Flash Seal
Flash seal is a bendable, adhesive flashing material used to support metal and PVC flashings during heavy rain or snow. It isn’t installed on its own but works as a protective cover to prevent leaks and rusting.
And it also boosts the drainage speed of typical flashing materials and increases the slope for a smooth water flow.
Tips to Pick the Right Flashing for Your Roof Design:
- Use step, apron, or valley flashings in high-rainfall or humid areas, and pick pipe or chimney flashings in drier, windy regions.
- Choose drip edges, saddle, or apron flashings to block pests, mold, and mildew in tropical and humid weather.
- Combine step flashings and drip edges for faster and more efficient drainage on a budget.
- Use kick-out baffles or gutters to cover the gap between the flashing and the gutters for more leak protection.
- Use good-quality roofing cement to prevent leaks with slow-drainage flashing like Pipe and Saddle flashing.
Does Flashing Go over or Under the Roof Shingles?
Roof flashing should generally be in line with the shingles and overlap them, but some flashings like Saddle and Skylight can also be concealed below the shingles. In contrast, flashing must never be mounted above the shingles as it might slide, break or damage the roof covering.
Can You Add Flashing to an Existing Roof?
Yes, you can add flashing to an existing roof. But first, you must remove all the shingles, pour some roofing cement to support the flashing, and sand it vigorously. Then, you can mount the flashing and reinstall your shingles.
How Do You Attach Flashing to the Roof?
Flashing is generally glued to the roof with heavy-duty C-TEC or CT1 adhesive. But, you can even nail it to the surface with pointed G.I screws or nails.
Can You Put New Flashing over Old Flashing?
No, you cannot put new flashing over old ones as it might slide from your roof and add more weight to the roof’s apex. Instead, remove the old flashing entirely and install a new one under the shingles.
Roof flashing seals the roof seams from leakage, strengthens the shingles, and enhances their durability. So, you can add different drip edge or step flashings at the wall joints, or surround your chimneys with chimney or apron flashings for better mildew resistance.
Likewise, you can also install flashing around different skylights and roof vent types. But where should you install the vents for high water resistance? Check this and more such roof vent questions here.